You are here
The Quest for the Telephone Teddy Bear (Part 2 of 2)
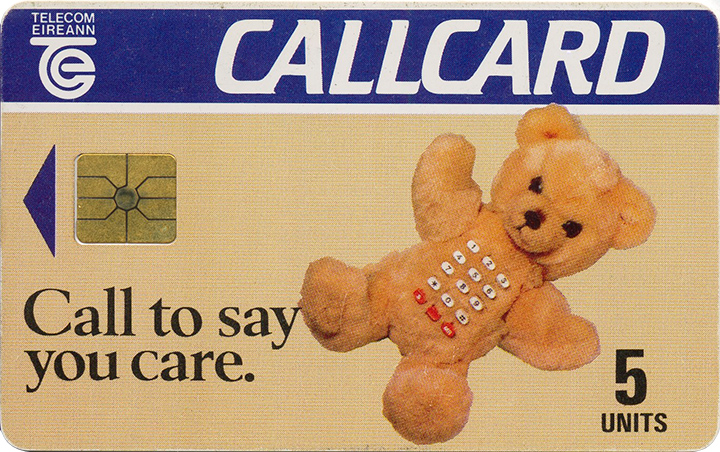
It's been a few weeks since my previous blog on finding the Telecom Eireann Telephone Teddy Bear (if you haven't read part one, read it here). Last time we wrote about this, we we're going to recreate the Telephone Bear from scratch. It's taken a few weeks because the phone and bear are hard to come buy.
After a bit of wheeling and dealing, we managed to get the Viscount Telephone of a girl in the UK. The Steiff Petsy Bear was bought on eBay from Germany in great condition. Now we've got our "Parts", it's time for us to play Frankenstein and create our creature of beauty!
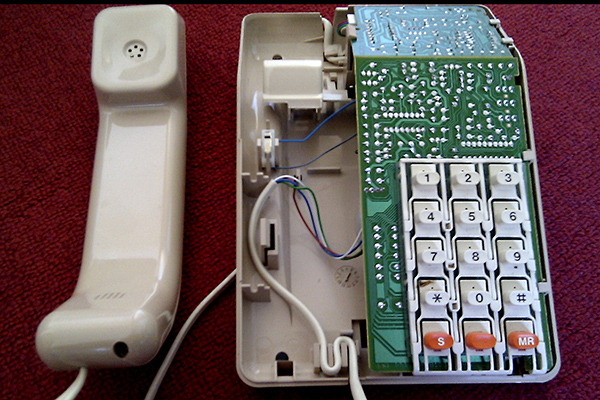
Only one screw on the phone (underneath the handset cradle) separates the top and bottom of the telephones chassis. We've direct access then to the keypad (pictured below) which comes off easy enough by pressing on a few clips holding it in place. And thats pretty much it! Its such a waste though purchasing a whole telephone for a few buttons but unfortunately it's next to impossible to find the buttons on their own.
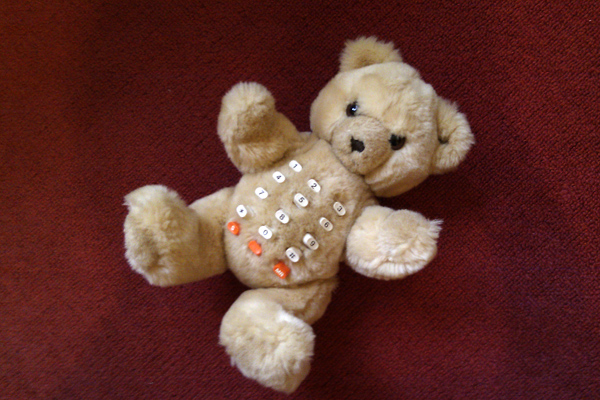
You can see in the picture below, I've laid the keypad on the teddybears stomach to see if the spacings correspond to the original image on the callcard. And they do more or less. So We're left with the dimemma of how or what way they are put on the teddy bear. Are they stuck on to its chest individually are they put inside the teddy bear and forced up through holes on its chest?

Firstly, I decide on the harder way (from the inside out) because I want this to look right. So I decided to play Dr. Frankenstein and begin to conduct my elaborate experiment! This has to be every teddy lovers nightmare (I know I felt squeamish doing this)... and that is making an incision in the back of the bear and removing all the stuffing. I did my best to get the keypad to fit but it was not working.
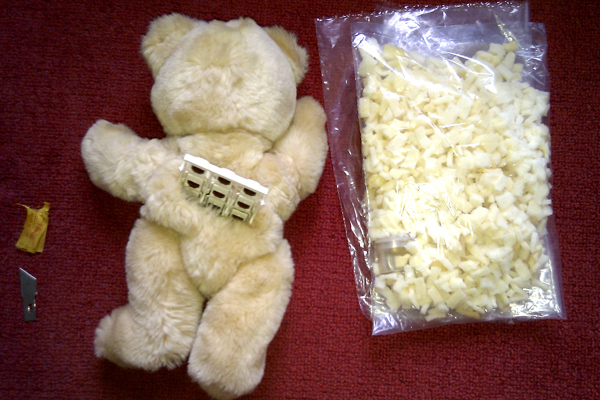
So I removed the keys from their plastic frame. It mean't that i would now have to manually allign the buttons. The keys had a wise base so I knew they wouldn't slip through the bear when I would make holes in his chest to push the buttons up through. I started off making a hole for the number 2 button and pushed the button up through. Disaster struck as I began to realise this wouldn't work. The keys weren't deep enough to show any prominence on the bears chest. I would have to go back to plan B.... put the bear back together, reshape the keys to the correct shape using a pliers and sandpaper and manually stick each othe keys to the front of the bears chest.
As you can image, I was very frustrated on discovering this latest revelation. So I've quicky stuck the keys on with prit stick to show you what the outcome has been. Looks good in my opinion, I just need to reposition the keys a bit more closer and maybe stick the keys in more permanently with superglue.
So there you have it! If you decide to create something similar, don't make the same mistakes we did! If you've any queries/comments, please leave a message below!